Wednesday, August 26, 2009

Upstairs Bath Renovation - Complete!

After 6 weeks of hard work, a complete mess, and 3 calls for bulk trash pickup, the bathroom is complete! We absolutely love it and are really proud of what we accomplished.

We decided to accent the light colored walls and white fixtures with a custom vanity with 2 doors and ball toekick(the floor model we had originally picked out didn't work with the way the pipes came out of the wall), large mirror, and medicine cabinet in java maple wood. The accessories are neutral stripes, with a stripe that matches the wall color and another stripe that matches the dark brown wood.

We installed a new light above the vanity, new towel and toilet paper holders, a new curtain, and new handles on the medicine cabinet to match the chrome faucets.

Not much else to say besides WE'RE DONE! So without further ado, here it is in all its glory:

Photobucket

Photobucket

Photobucket

Photobucket

Photobucket

Photobucket

Photobucket

Photobucket

Sunday, July 26, 2009

Upstairs Bath Renovation - Part 3

After the primer had a day to dry, I took on painting the bathroom a soothing shade of yellowy-cream (the exact name is Homestead Resort Tea Room Cream by Valspar - who makes up these names?). I chose it because it matched one of the stripes in the shower curtain/accessories I had chosen for the room and because it's the only color we hadn't used yet in the house.

Now that the trim was dry, I reinstalled the blinds and window treatment. I also hung a toilet paper holder and the lone piece of artwork (in order to convince myself it was near completion for sure).

Photobucket

Photobucket

After Andrew scored a great deal on a really nice tile saw, he spent the next weekend tiling the shower walls. The spaces are a bit larger for these tiles at 1/4". We decided to "spice it up" with a row of darker tile by the same brand up near the top and two white corner shelves on each side.

The tiling took two days, then another 24 hours to set. Andrew then grouted with the same color we used on the floor (linen), allowed that to set, then undertook the tedious job of cleaning it. Then, a spray sealer for the grout and another 24 hours to dry. Finally, tons and tons of caulk (which is oh so fun to scrape off the bottom of a tub).

Despite any of the (usual) mess, Andrew did an absolutely amazing job. The tile is perfectly set and simply gorgeous. Pretty awesome for a first-timer, eh?

Photobucket

Photobucket

Photobucket

Photobucket

Photobucket

Next weekend - all the finishing touches! Hooray!

Wednesday, July 15, 2009

Upstairs Bath Renovation - Part 2

Ok, on to the demo of the shower... and another huge mess. Bags and bags of pink tile and crushed up grout and plaster. Down to the studs! I actually thought it was kind of neat to see the original plaster and lath from when the house was built - this section is actually a view of the backside of the hallway going up the stairs.

Photobucket

Next step: vapor barrier. It's simply sheets of polyethylene plastic stapled to the studs in a way that allows any vapor buildup to flow down away from the walls. Some people consider it an extra step, but when it's YOUR house, it's a step worth taking.

Photobucket

That following weekend, tile installation. Mixing the thinset was like wrangling a bucket of mud with an electric beater... and messy (see a recurring theme here?). Andrew laid all of the tile using 1/4" spacers, then placed weights on any of the areas that didn't want to stay level on their own.

Photobucket

Photobucket

Photobucket

Photobucket

After the thinset had 24 hours to set and dry, I began taping and mudding all the seams. Three coats of that and another 24 hours of drying time, and I sanded everything down to a smooth finish. Andrew spent a night grouting the tile, I added a coat of primer and hey... it was starting to look like a room again!

Photobucket

Photobucket

Photobucket

Now, back to the shower. Andrew installed the necessary cement backerboard to adhere the tile to and more greenboard around the top, above where the tile would end.

Photobucket

Photobucket

Next stop... tiling the shower walls!

Sunday, June 28, 2009

Upstairs Bath Renovation - Part 1

I loved my house from the day we moved in. Really. But I HATED the upstairs bathroom. It was pink tile. Everywhere. Every surface. And was stuck somewhere around 1989. I did the best I could with it for a year and a half, but always felt it wasn't even close to the level of awesomeness as the rest of our house.

Although we have a full bath on the first floor (with a stall shower), the upstairs bathroom is the only other full bathroom (and only tub) and is shared among all the bedrooms, including the master on the third floor. So basically - it gets a ton of use. I was literally counting the days until we could dig in and make it a place I want to retreat to with some bubbles and a glass of wine.

Here are some before shots of the pink atrocity:

Photobucket

Photobucket

Photobucket

We waited until May to start. The downstairs bathroom just isn't that warm in the cooler weather, plus we're out of a tub so I figured I could just bathe the kid in the yard once in a while if it was really hot :)

First step - remove all the fixtures! We are keeping the toilet and tub, as they are in good condition and a totally non-offensive white. Everything else is going to be sold/given away depending on its condition.

Photobucket

Now for the messy part - demo. It was done in two parts - the main part of the room first, then the tub area. So Andrew first took care of the demolition of the non-tub walls and the floor, and I cleaned up every couple hours to keep him from drowning in broken tile and dust. We had to wear masks and gloves and still ended up coughing, sneezing, and a little cut up. By the end of Memorial Day weekend, however, the bathroom was down to the studs and subflooring.

Andrew immediately started putting the greenboard up (drywall with a water-resistant paper covering) on the non-tub/shower walls. Our son had decided to become potty trained that week and I desperately wanted the upstairs toilet to be back in commission.

Photobucket

Photobucket

Photobucket

It certainly seems like a mess at this point (and oh boy, it is), but I also think it looks better already. My two men are working nonstop to make "spa" bathroom a reality!

Photobucket

Saturday, June 27, 2009

Groundskeeping

I'll start by saying that we don't have a lot of property. Pretty much no one in our area does. You can practically reach out of the playroom window and touch my neighbor's house. I don't mind it much and it certainly keeps property maintenance at a reasonable level.

Here are some pics from the week we moved in - October 2007:

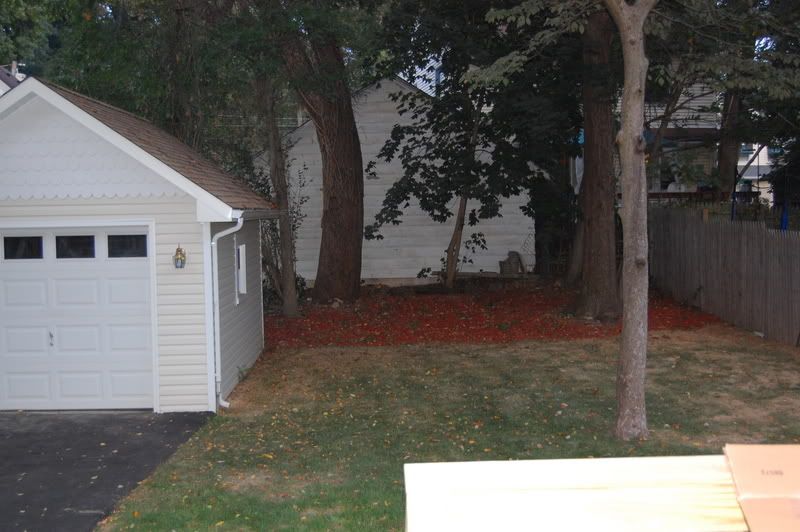
The people who flipped our house kept things pretty simple. They cleaned up the yards, threw down some sod, and set up some simple gardens with reddish mulch to define them.

Photobucket

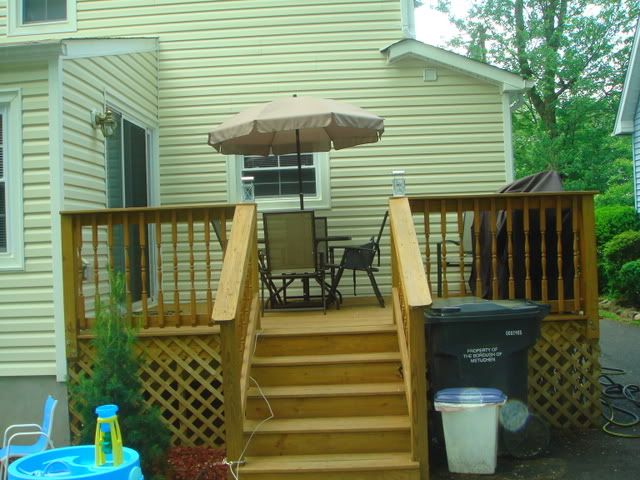
They added a great little deck to the back of the house, which we absolutely love. Just enough for a table and chairs set and a grill. And Pepper loves to lounge on it.

Photobucket

Photobucket

Photobucket

Summer of '08: We kicked off the warm weather by putting in a fence. It goes along the property line on the far side of our driveway and crosses over the driveway to the deck with a double gate. We only needed to install a gate on the other side of the house, as our house is only several feet from our neighbor's fence. The back of our property was already fenced in - we spruced it up a bit to make it dog-proof.

Photobucket

I added scalloped cement blocks (that I discovered hiding behind our garage) to the front garden to define it better, threw down some fresh mulch, and added a few perrenials.

Photobucket

Photobucket

I hated the scrubby little deck garden - I feel like they randomly chose 6 plants and plopped them in there haphazardly - so I moved what was in it to the front and back gardens and created a play area for Tyler. We also stained the deck, which ended up being a bust because it did NOT wear well over the next year. Oh well... live and learn!

Photobucket

Photobucket

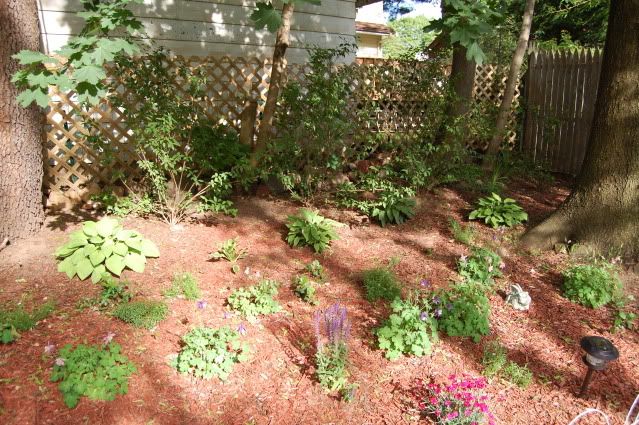
The back garden got a general cleanup, some annuals and perennials, and a bag or two of mulch. We also added some latticework to the wire fence back there - it's a lot more inviting and hopefully the ivy I planted will crawl up it and afford us some more privacy.

Photobucket

Photobucket

Summer of '09: No huge changes out front really. I added twice as many annuals this year, some solar lights, and "decorated" the front porch with a shrub and a cute little chair Tyler sits on to wait for his father to come home. The grass looks awesome because Andrew treats it like one of his children. I think we've succeeded in having some decent curb appeal!

Photobucket

Photobucket

We decided to address the deck again. After stripping it (which was no small feat) Andrew restained the floor of the deck. I primed and painted the railings white, which turned out even better than I thought it would.

Photobucket

Photobucket

Tyler's play area got a facelift as well with the addition of a clubhouse and picnic table. The box by the deck stairs contains all of his miscellaneous outdoor toys.

Photobucket

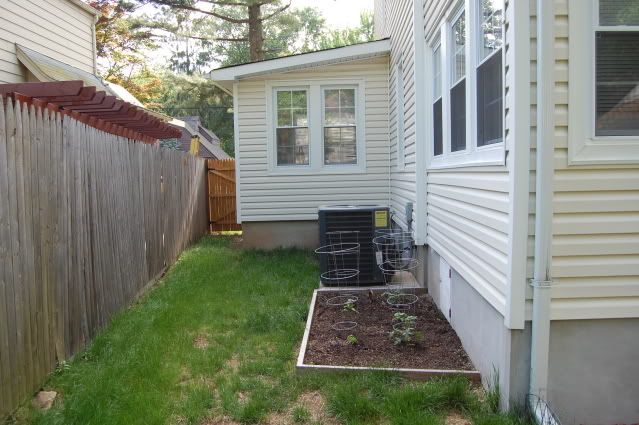
I decided to finally start my vegetable garden this year. I put it over on the side of the house, where it gets tons of sun and grass doesn't grow anyhow. I planted 2 tomato plants, two cucumber plants, one yellow pepper plant, and one zuchinni plant.

Photobucket

Photobucket

The back garden got a facelift as well, with the addition of several more annuals, a white fence, and more solar lights. This garden is particularly hard to maintain... the weeds are unstoppable and the trees above it dump branches down every time a storm blows through. Still, I love staring at this garden from my kitchen window while I'm at the sink. I'm still waiting for the ivy to cover my neighbor's old garage though.

Photobucket

Photobucket

We don't have many more plans for our property besides a few odds and ends, such as patching the bare spots in the yard (mostly a result of the dog) and adding a sprinkler system some day. As I said, we don't have much... but I'd like to think we made the most of what we have.